# OAuth Configuration
Starting from Blessing Skin v5, we provide third-party login functionality based on OAuth2 and implement it as a plugin. With these plugins, your users do not need to register or enter a password to log in, but use their accounts on other websites or platforms to directly access the skin station.
# Basic
First, install the "OAuth Client Core" plugin in the plugin market. All third-party login functions depend on this plugin.
# Microsoft Live
# Register the app
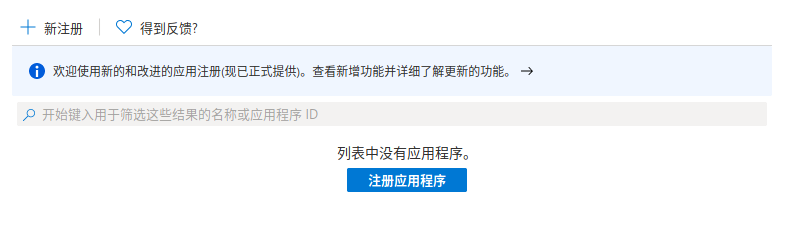
Open Microsoft Azure (opens new window), click "More Services":

Then search for "App Registration" and click to enter:

Click "Register Application" on the page:
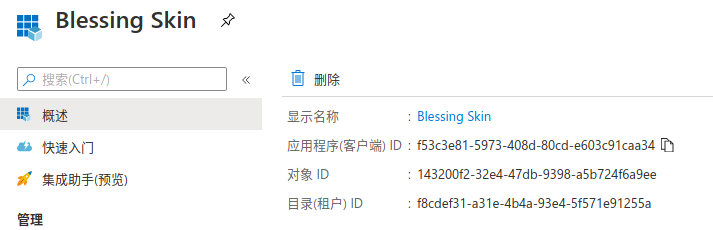
Then fill in the Name and Redirect URI:

"Name" can be filled in as your skin site name; "Redirect URI" is to modify the domain name according to your skin site address, but the /auth/login/live/callback does not need to be changed.
After filling in, click the "Register" button at the bottom of the page and wait for a while. After the registration is complete, you will get the "Application (Client) ID" and copy it.
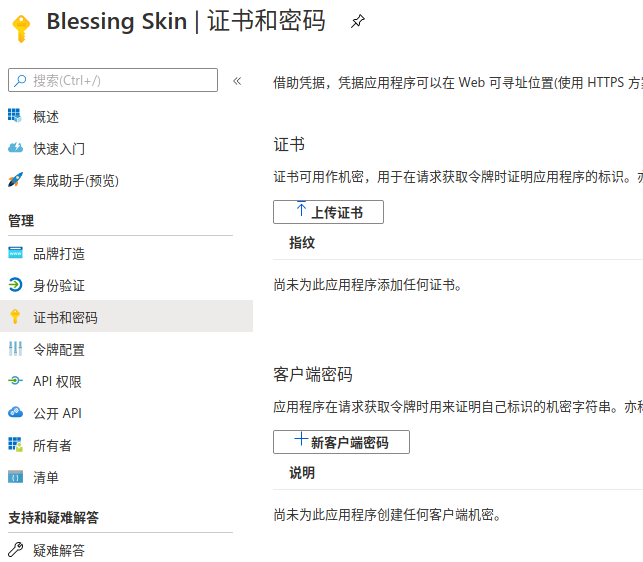
# create password
On the page that follows, select Certificates and Passwords on the left side of the page, and click + New Client Password.
In the form, set the "Deadline" to "Never", and the "Description" can be filled or not filled:
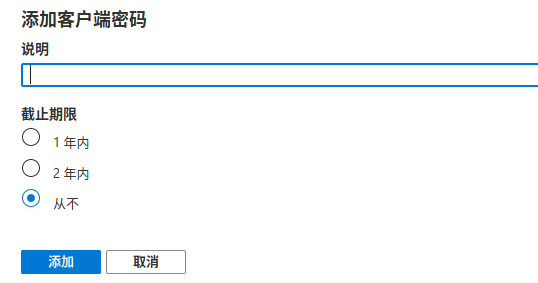
Then click "Add". At this point you will get the "client secret":

NOTE: This password will only appear once, so it must be copied.
# Install plugin
Enter the plugin market of Blessing Skin, download, install and open the "Sign in with Microsoft Live" plugin.
# Configure the plugin
Configuration of plugins is done by modifying the .env file. Add the following three configurations to the .env file:
LIVE_KEY- application (client) ID (automatically generated by Azure when registering)LIVE_SECRET- client secret (we already added one earlier)LIVE_REDIRECT_URI- the same as the "Redirect URI" we filled in when registering the app
According to the results of our previous operations, it can be filled in like this: (please modify it according to your actual situation)
LIVE_KEY=f53c3e81-5973-408d-80cd-e603c91caa34
LIVE_SECRET=uC00c-GnlIF199Nw34-K_A~T6sWQmQnW-S
LIVE_REDIRECT_URI=https://localhost/auth/login/live/callback
# Finish
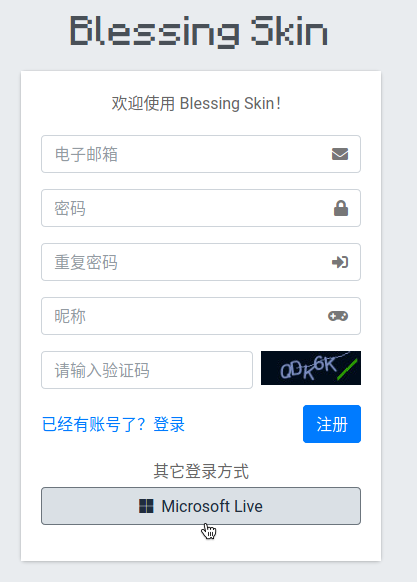
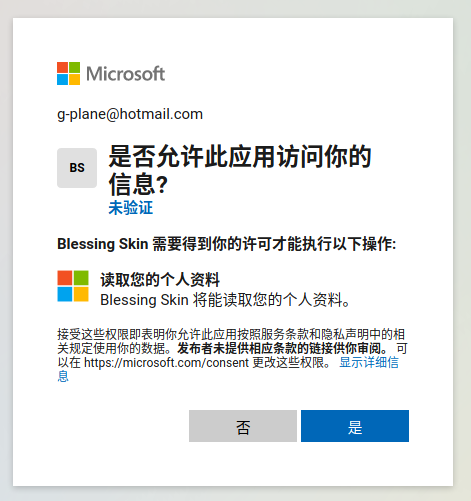
When users register or log in, they can choose "Microsoft Live" to log in:
# LittleSkin
# Create application
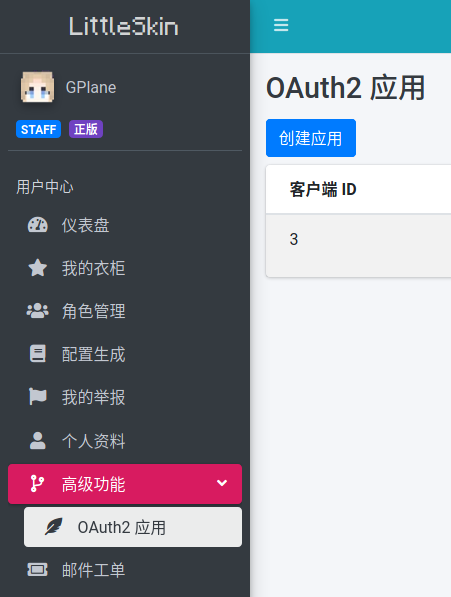
In the "User Center" click "OAuth2 Application" under the "Advanced Features" menu:
Click the Create App button and fill out the form:
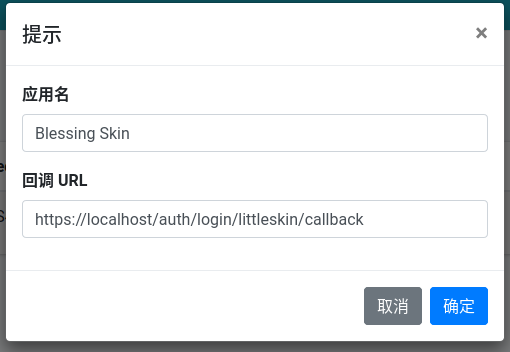
The "application name" can be filled with the name of your skin station; the "callback URL" is to modify the domain name according to your skin station address, but the following /auth/login/littleskin/callback does not need to be changed.
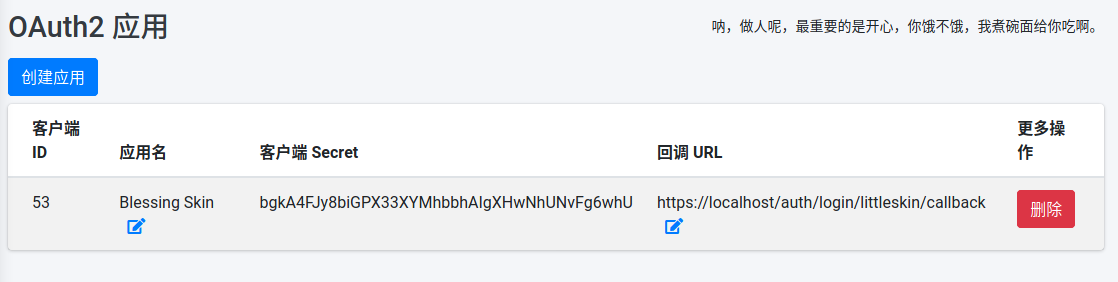
Click "OK", and then you can see the application you just created:
# Install plugin
Enter the plugin market of Blessing Skin, download, install and open the "Sign in with LittleSkin" plugin.
# Configure the plugin
Configuration of plugins is done by modifying the .env file. Add the following three configurations to the .env file:
LITTLESKIN_KEY- Client IDLITTLESKIN_SECRET- Client SecretLITTLESKIN_REDIRECT_URI- callback URL
According to the results of our previous operations, it can be filled in like this: (please modify it according to your actual situation)
LITTLESKIN_KEY=53
LITTLESKIN_SECRET=bgkA4FJy8biGPX33XYMhbbhAIgXHwNhUNvFg6whU
LITTLESKIN_REDIRECT_URI=https://localhost/auth/login/littleskin/callback
# Finish
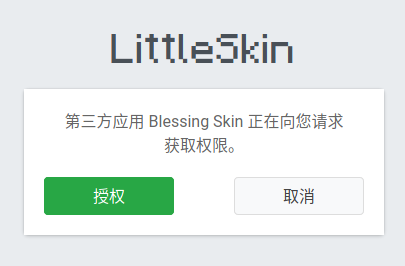
When users register or log in, they can select "LittleSkin" to log in:

# GitHub
# Register the app
Open GitHub, go to the settings page, and click "Developer settings" in the left column:

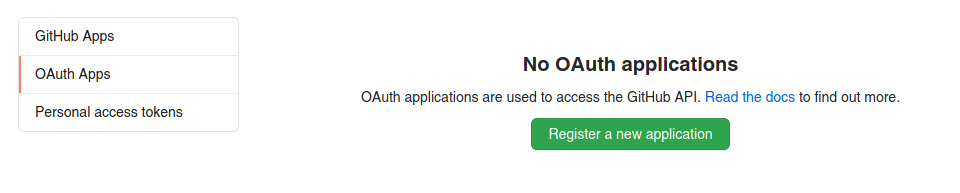
Click on "OAuth Apps" in the left column on the following page:
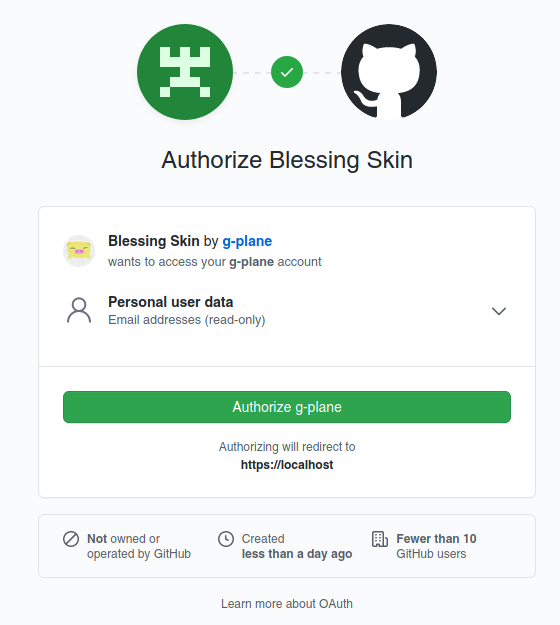
Click "Register a new application" and fill out the form:
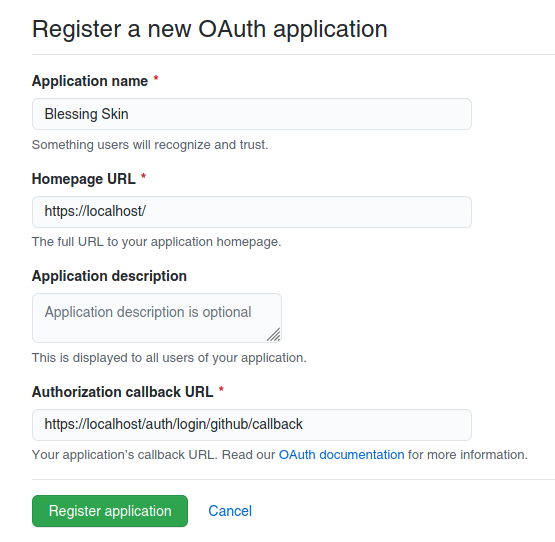
Among them, "Application name" is the name of your skin site; "Homepage URL" is the home page URL of your skin site; "Authorization callback URL" is to modify the domain name according to your skin site address, but the /auth/ login/github/callback does not need to be changed.
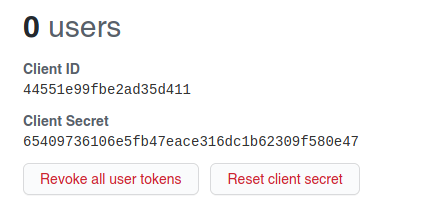
Click "Register application" to continue. At this point you will get the Client ID and Client Secret:
# Install plugin
Enter the plugin market of Blessing Skin, download, install and open the "Sign in with GitHub" plugin.
# Configure the plugin
Configuration of plugins is done by modifying the .env file. Add the following three configurations to the .env file:
GITHUB_KEY- corresponds to the "Client ID" provided by GitHubGITHUB_SECRET- corresponds to the "Client Secret" provided by GitHubGITHUB_REDIRECT_URI- corresponds to the "Authorization callback URL" we just filled in
According to the results of our previous operations, it can be filled in like this: (please modify it according to your actual situation)
GITHUB_KEY=44551e99fbe2ad35d411
GITHUB_SECRET=65409736106e5fb47eace316dc1b62309f580e47
GITHUB_REDIRECT_URI=https://localhost/auth/login/github/callback
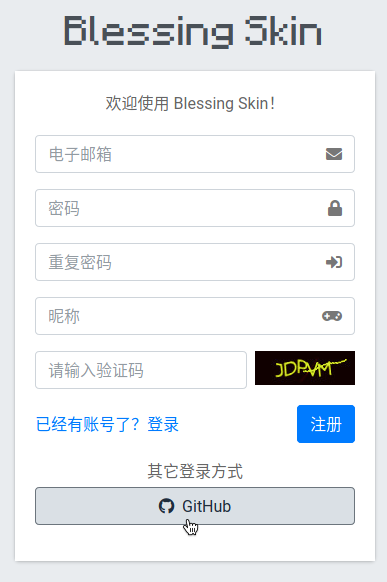
# Finish
When users register or log in, they can select "GitHub" to log in: